OpenClaw How to Deploy, Configure, and Use an AI Agent Platform for Scalable Automation
What Is OpenClaw and Why It’s So Relevant for AI-Driven Development
If you’ve missed the most recent fad in the artificial intelligence development industry, OpenClaw has been trending strongly over the past few months. It is an open-source tool for developing multi-agent systems easily and seamlessly, allowing non-technical users to build complete, stable, and reliable AI agents. Its success has been so strong that its GitHub repository has become one of the most popular across all platforms, surpassing even the Linux kernel repository, which is an incredible feat for such a recent project.
It is an agentic software development framework that offers, then, a great benefit, most of all for “non-techy” people, as it can be configured almost entirely by just speaking in natural language to the agent with an integrated ChatGPT-like chat that actually understands you and can set everything up through chatting. That’s the point where OpenClaw shines best: it can be configured and programmed with natural language, and it will work just as well as handcrafted AI agents. Also, it connects directly to a Telegram or Discord bot, or to a WhatsApp number; so, it is very versatile and can be used in a myriad of different contexts and situations, fitting perfectly into whichever one you might need to use in your work or personal project.
Core Concepts Behind OpenClaw
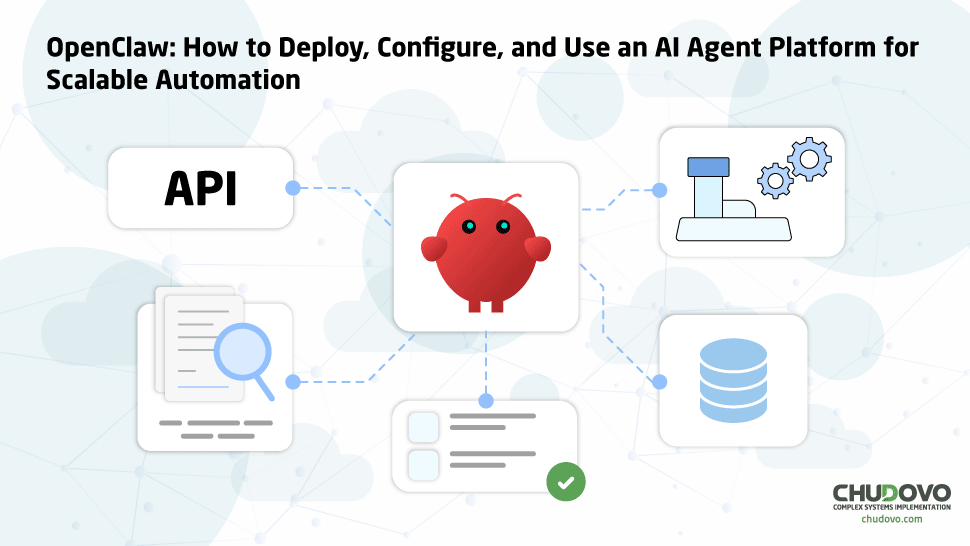
OpenClaw runs based on a few main concepts. First of all, it is based on four main components: agents, tools, tasks, and memory. In this architecture, the agent is the functional part that interacts with the user and orchestrates everything; still, the agent doesn’t do things on its own: it always activates tools, which are executable interfaces that interact with APIs, databases, scripts, etc. The tasks are processes currently in execution, that is, the things the agent is actually doing, and the memory is the context and attention span that an agent can understand and remember. The memory also helps with reprocessing and can improve decision-making and make decisions more assertively.
Hence, the big difference between using OpenClaw and a traditional bash script connecting to an LLM, or even other frameworks such as LangGraph. OpenClaw reasons on top of your input, understands what to use and how to use it, and can connect to a myriad of different solutions, MCPs, APIs, databases, or even run scripts itself, to accomplish a specific end. The sky is literally the limit in this case, as it is such a complete and autonomous solution, basically the best we could have for a one-size-fits-all case to develop automation with AI agents.
Hence, we can come to a mind model of how it actually works:
- Input arrives
- Agent interprets the objective
- Agent decides: Do I need to use a tool?
- Tool gets executed (API, DB, script)
- Results come back to the agent
- Agent evaluates: should it finish or continue?
- Final output
And that’s what makes OpenClaw such a no-brainer for developers, CEOs, or even people who are not experts in programming and software development but are still enthusiasts over it or use it heavily.
Prerequisites for Running OpenClaw
To start running OpenClaw and create your AI-powered workflows and LLM orchestration, you must first and foremost pick up an AI solution to use. Most developers have been choosing Claude or ChatGPT, which are no doubt the best and most expensive solutions available and will surely fit whatever you might need to do. On the cheaper side, on the other hand, many people have been using Kimi, Mistral, and some of the solutions available at OpenRouter. Though they are a little less powerful, they will surely fit more than 90% of the use cases your projects might require, unless it really needs an immense amount of computing and processing. But for day-to-day, usual tasks, they are more than enough.
Also, in case you want something deeper than a toy project, you will need a dedicated machine to run OpenClaw or a VPS to host it. That’s because it is really very dangerous to set up OpenClaw in a completely local environment, running on bare-metal machines, as it can and probably will access critical system settings and data in your computer. So, if you really have to run it locally, then it is 100% the best option to use via Docker, or, if possible, on a different machine.
And finally, the last thing you will need is a means of communicating with it. The most used ones are either Telegram or Discord bots. Both are very easy to create and manage, and you don’t really have to do anything complicated with them: you only have to create them and get a token, and then add that token to your OpenClaw configurations. It will set everything else up automatically.
Step-by-Step OpenClaw tutorial: How to Install and Deploy
Configuring your Docker Compose file
First of all, as we discussed previously, we will use Docker to containerize our environment and keep it separate from the rest of our computers. As OpenClaw is completely autonomous from human interference, it can and probably will at some point try to mess with your system’s configs or your personal files, so it’s best to prevent it entirely by using Docker. And, to do so, first of all, we must create a folder to store our OpenClaw files and then create a “compose.yaml” file with the following inside:
services:

 openclaw:

   container_name: openclaw

   image: ghcr.io/openclaw/openclaw:latest

   ports:

     - "18789:18789"

   environment:

     OPENAI_API_KEY: ${OPENAI_API_KEY}

     ANTHROPIC_API_KEY: ${ANTHROPIC_API_KEY}

     OPENROUTER_API_KEY: ${OPENROUTER_API_KEY}

   command: ["node", "openclaw.mjs", "gateway", "--allow-unconfigured", "--bind", "lan"]

   restart: unless-stopped
You must pay close attention to the spacing used! YAML files follow a strict hierarchy, and they will not work if you break it. Now, as you can see, we are declaring three environment variables, which are the API keys to our AI models. And, to declare and fill these variables with your actual values, you must create a “.env” file in the same folder as your keys, something similar to this:
OPENAI_API_KEY=""

OPENROUTER_API_KEY=""

ANTHROPIC_API_KEY=""
Now, of course, you only need to fill in the values you’re actually going to use, and these will then be injected into the environment your Docker Compose creates.
Running it with Docker
Now that we have created both these files, we can build the project using Docker from the images we have declared in the “compose.yaml” file. To do so, you need only to run the following command in your terminal, opened in the directory created previously for our OpenClaw files:
docker compose up -d --buildIn case you don’t know exactly how it works, here’s a quick summarization:
Docker is a system to create containers inside your machine. Such containers are used to encapsulate applications, services, and servers, running them on your machine but in a different environment; so, they are set apart from your personal processes and can’t access your personal data as well. It is very beneficial for OpenClaw deployment, even in local instances, as it ensures your stuff will be safe.
So, Docker uses files such as Dockerfile and “compose.yaml”. The Dockerfile is the name of the file that creates a Docker image from software; so, OpenClaw’s source code has a file named Dockerfile that declares how an image should be built from it. And then, “compose.yaml” declares how to orchestrate different images so they can communicate with each other and the external environment, to form a complete system. So, let’s say you have a full-stack web application that uses backend, frontend, and a database, and you want to coordinate everything with Docker. Each service must have its own Dockerfile, and there should be a “compose.yaml” file to declare how these images should be loaded and communicate with each other. You will be able to control your whole environment with just a few commands, such as our “docker compose up -d –build” from previously, which builds everything that’s written in the compose file.
Accessing it locally and interacting
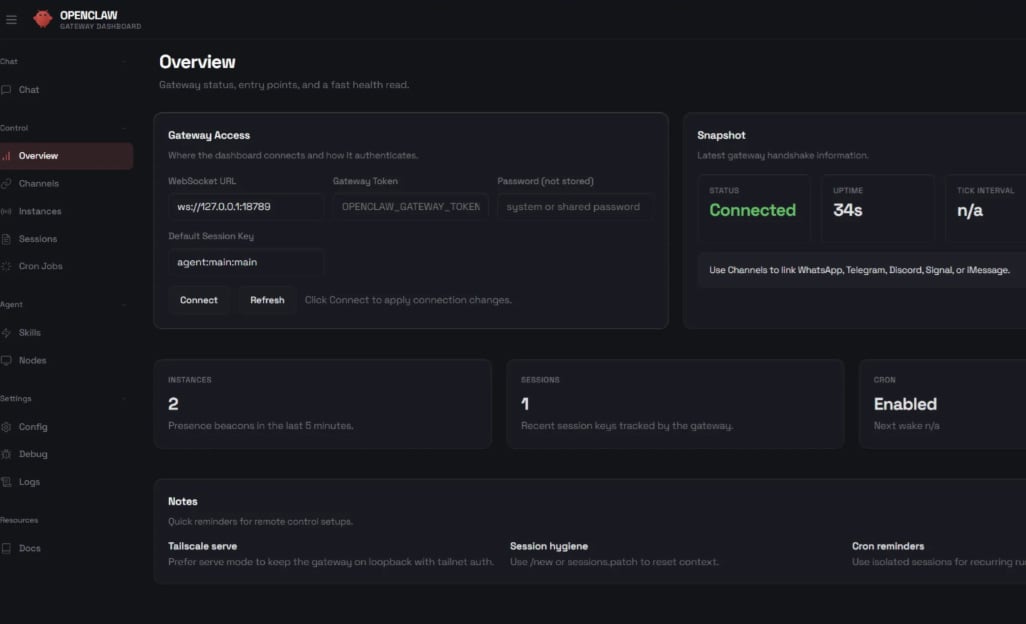
Now, once you’ve built your Docker images and started the service, you can access it at http://localhost:18789. One of the most important things you should know is that you can choose the model your OpenClaw is going to use with the commands “/models” and “/model”. The first one lists all the available models, and is also used to sort the lists of models by provider (such as OpenAI, OpenRouter, Kimi, etc), and the latter is used to choose one.
You will see an interface more or less like that, which allows you to chat with the model and also easily configure everything else. But keep in mind that, if you want to use a provider different from those we added in the compose file, then you will need to add its API Key to the environment and restart the container.
How to Run OpenClaw For Cheap
Cheapest AI Models
Now, as you probably know by now, it can become extremely expensive to run OpenClaw. Each API request made takes at least 10 thousand tokens, a number that adds up absurdly fast and can cost you way more than it should. So, to avoid that, in case you don’t really need OpenAI and Anthropic’s very expensive reasoning models, you can use some much cheaper alternatives that are almost just as good. They are listed as follows:
- Kimi K2 (Moonshot AI): Costs $0.60 per million/input tokens and $2.50 per million/output tokens;
- Qwen Turbo (Alibaba): $0.05 per million/input tokens and $0.20 per million/output tokens;
- Qwen 3.5 Plus (Alibaba): $0.26 per million/input tokens and $1.56 per million/output tokens
- DeepSeek V3.2 (DeepSeek): $0.14 per million/input tokens and $0.28 per million/output tokens. Note about DeepSeek: though it is recognized as the best cost/benefit on the cheaper side of the AI models, the last time we checked, DeepSeek outright did not work with OpenClaw. There was an open issue on its GitHub repository, but we don’t know if it’s been fixed yet, nor how trustworthy it is.
- OpenRouter also shows up as an extremely solid option with very accessible prices, though we can’t bring one specific pricing as it is more of a broker of different AI models, and you must choose which one to use.
How to Run For Free (or Almost)
Now, if you want to go even cheaper than that, you have some options to choose from. First of all, you can do what many OpenClaw users have done: run a language model locally, such as Qwen 3.5 9B or others via Ollama. You can do that on your own machine, in case it is a bit more powerful (at least 16Gb of RAM, preferably a dedicated GPU), or, as most users have done, run it in a Mac Mini. As most Mac Mini PCs offer a good integrated GPU, or even a dedicated NPU already, they can usually run AI models really well, with good results, and support for heavier reasoning models.
Your other option is to use OpenRouter or another free model provider, such as OpenCode. It offers a suite of entirely free AI models that you can use, though it has a few rate limits: on your first day, you can make up to 50 API requests, and then it resets to 10 requests a day 24 hours later. But, if you pay US$10, you can make up to 100 requests a day using free models, so your $10 in credits won’t be worn out, and you can still use them very well. The problem with these options is that these models aren’t that good, hallucinating more frequently and bringing bad results to your AI-powered software development.
Conclusion: When to Use OpenClaw in Production
OpenClaw is an extremely powerful and also very dangerous tool for developing entirely autonomous AI agents. It is nicknamed “the AI that actually does things” on its own website, and so it is: OpenClaw can work complex processes and pipelines from a single prompt sent to a Telegram or Discord chat, and there are very few limits to what it can do. That’s what makes it so dangerous: if you run it in a local environment or with too powerful authorizations, it can wipe out personal data, change crucial computer files, and even send hazardous emails or messages via your personal accounts. So, as always, with great power comes great responsibility: you must watch very carefully how to use it, what to do with it, and how to use it with prudence.